How To Create A DIY Wall Hanging to Add Flair to Any Room

When I was a youngster, I got a hold of a certain craft supply and went a little nuts with it. For years.
It had all the qualities a kid could love in a craft: it was sticky, it was runny, I could use it on every project, it even disappeared once it dried. It was a glue, a sealer and a finish. It made things pretty and unique with just a few goopy sponge gobs and strokes.
E-v-e-r-y-t-h-i-n-g that I could use it on, I did. I made sure of it. Journals, storage boxes, jewelry, nothing was safe from my reach and its coating. For years.
Yet with all good things, or perhaps with the act of growing up, there came a time when it seemed I had reach the limit on how many projects I could do with my favourite craft supply.
Or had I?
After years of rest, this week my sponge brush came out of retirement for the next generation, and reconnected with its long lost friend. Have you guessed it yet? Read on…
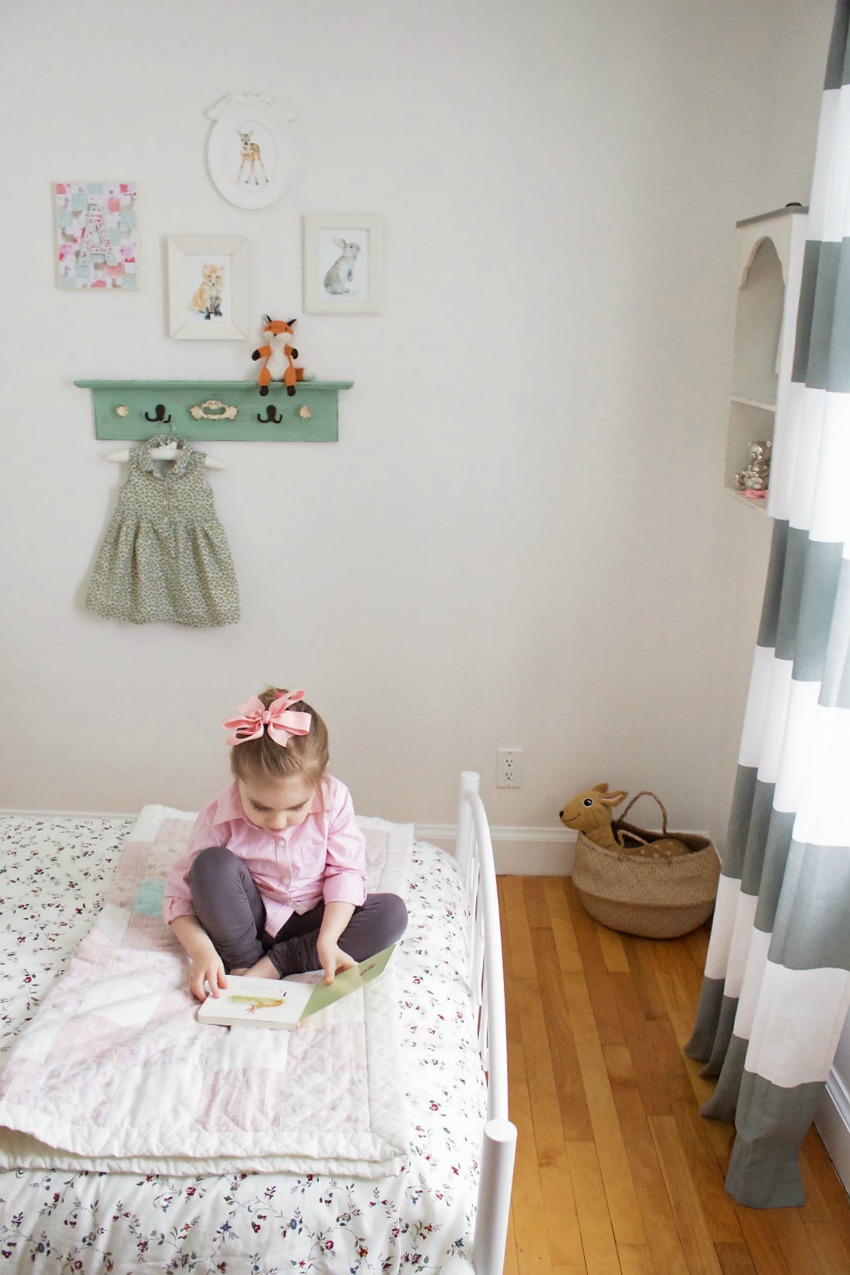
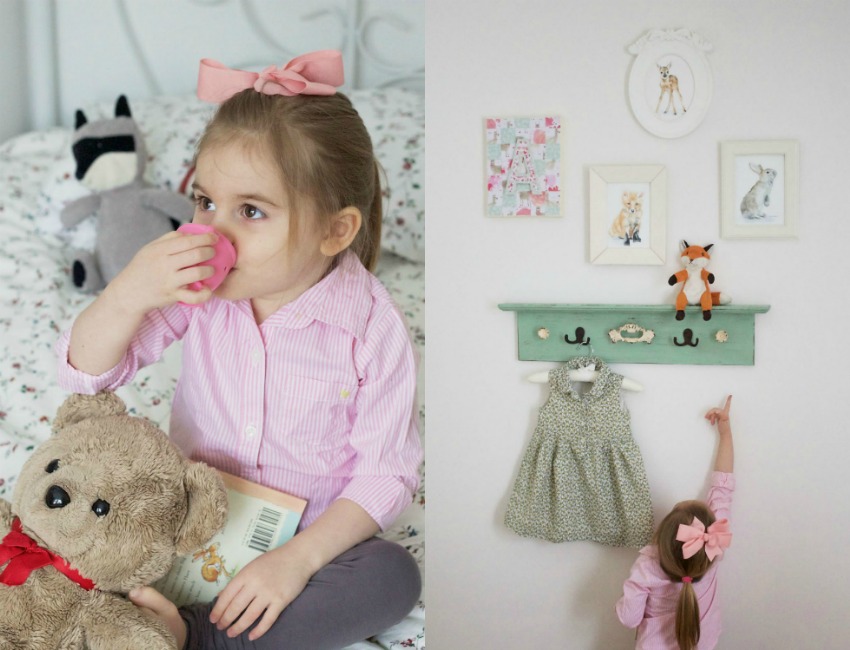
One of my favourite ways to spruce up a room’s décor is by finding an easy, inexpensive DIY project that exudes that quaint, handmade quality I love so much. Since my daughter recently turned three, we decided to redecorate her bedroom with a colour scheme of pinks, greys, and soft green hues, and to follow a motif of natural flowers and woodland animals, both of which she loves (who doesn’t want adorable little creatures scampering around in their decorations?).
I also figured it was about time she learned the magic of Mod Podge. Yes, the greatest craft supply ever. It is the one thing that makes crafting SO fun, SO easy, SO fool-proof.
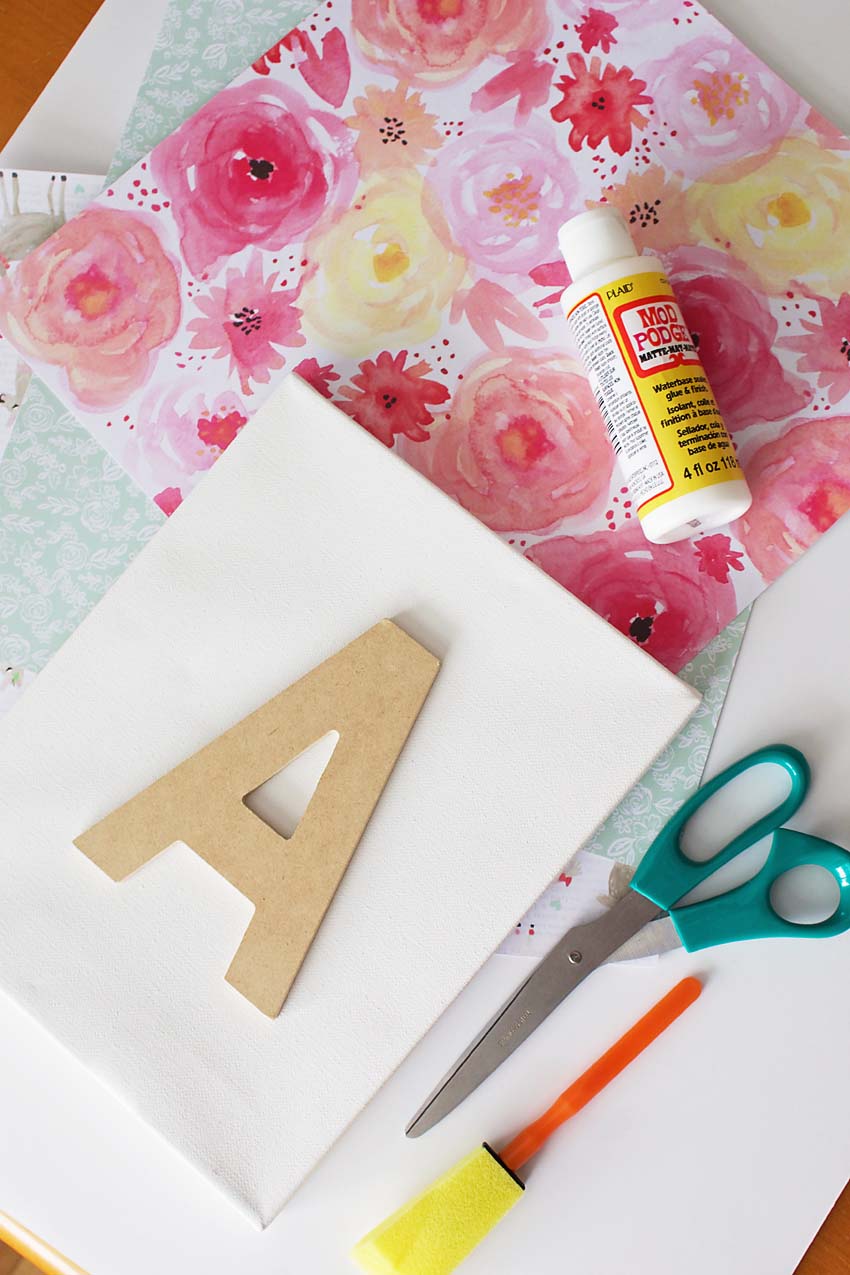
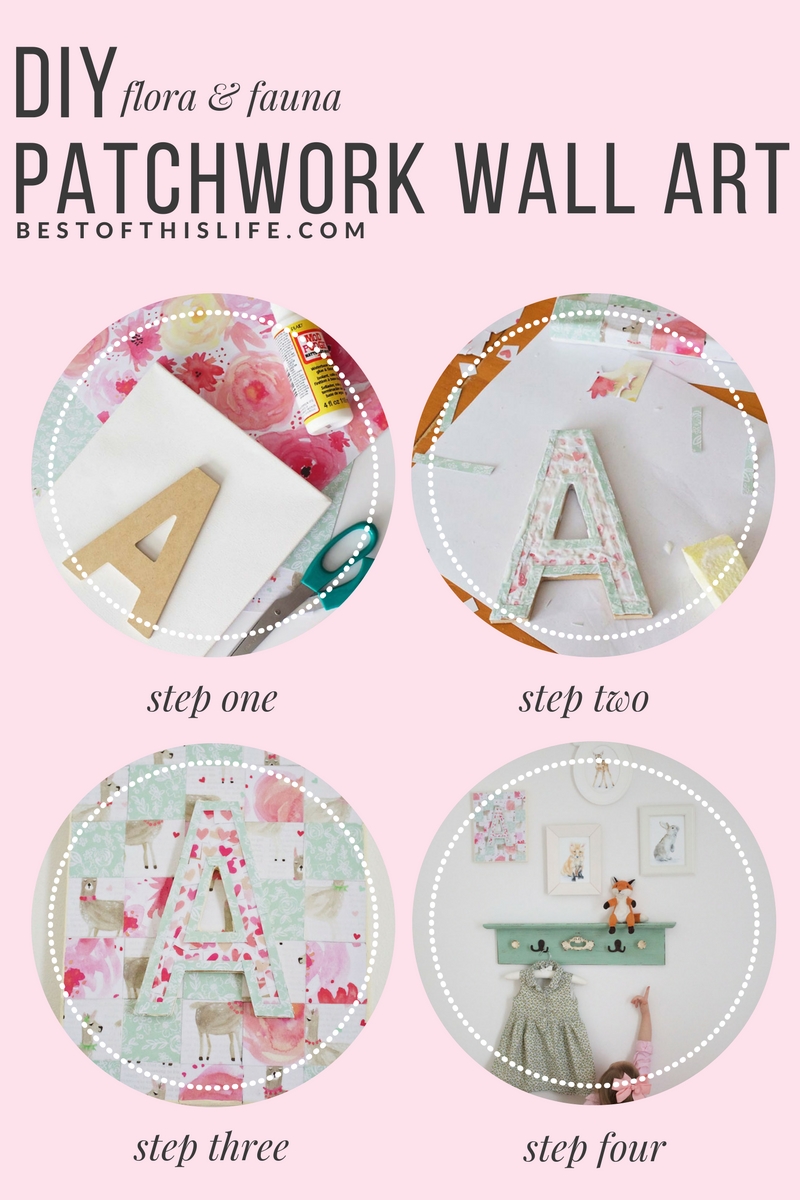
Along with some purchased wall art and trinkets to complete the feel of a flora-and-fauna wonderland, I wanted to hand-make a unique piece of artwork that Abigail could treasure for years to come. I decided on a patchwork letter canvas wall hanging, because it only required seven items to create, involved the joys of Mod Podge, and could be completed for under $30 altogether.
To get started, I made a list of everything I needed:
1. An 8×10-sized blank canvas (you can choose something larger or smaller; it’s all about your preference and wall space!)
2. A pressboard letter (I decided to go with a large “A” for Abigail, but you could always spell out a word with smaller letters. Some of my favorites include “love,” “faith,” or your child’s whole name.)
3. Patterned scrapbook paper
4. Matte Mod Podge glue
5. A sponge brush
6. Scissors
7. Acrylic paint (in Warm White)
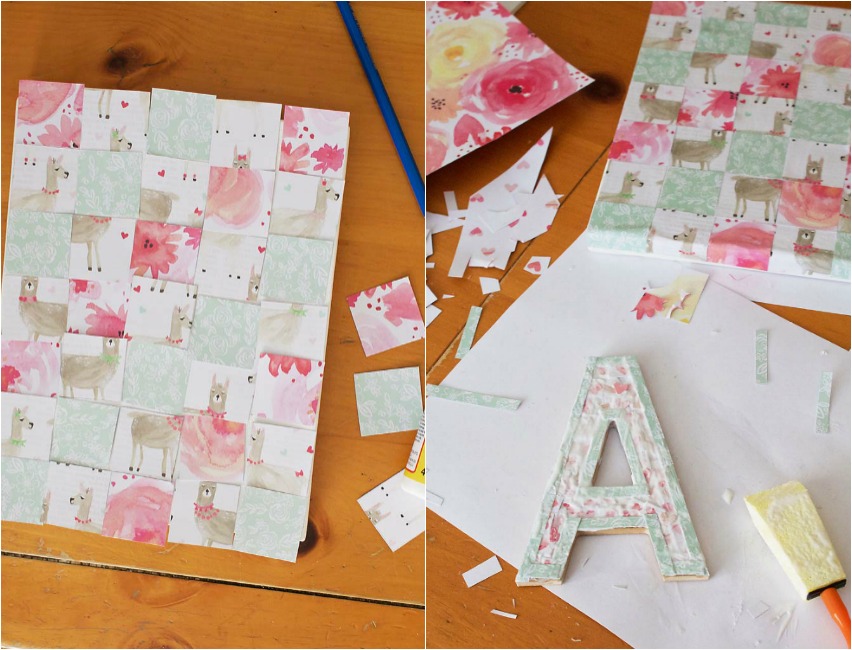
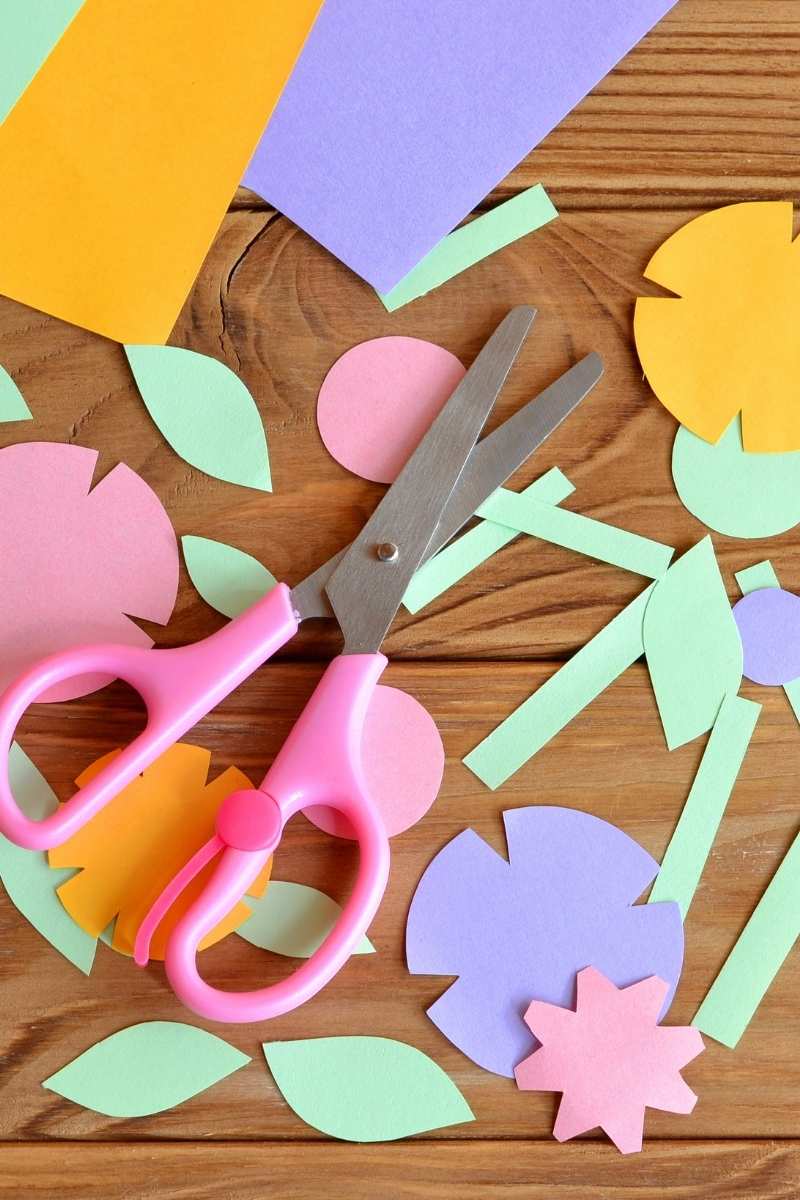
Once I purchased everything necessary, I got to work creating my DIY wall hanging. I began by cutting out 1 and 3/4-inch squares from the patterned scrapbook paper, and started to glue them in a patchwork pattern onto my blank canvas. Once I’d covered the entire canvas with my scrapbook paper squares, I sealed it with a layer of the Matte Mod Podge glue.
Then it was time to cover my pressboard letter “A” in paper; I decided to stick with two motifs that slightly contrasted the patchwork style behind it, but you can definitely use your creativity and mix it up! You might even choose to simply paint the pressboard letter. I applied the Matte Mod Podge glue to the paper pieces (cut up in small squares and triangles) and applied it to the pressboard letter, allowing it to dry for about ten minutes.
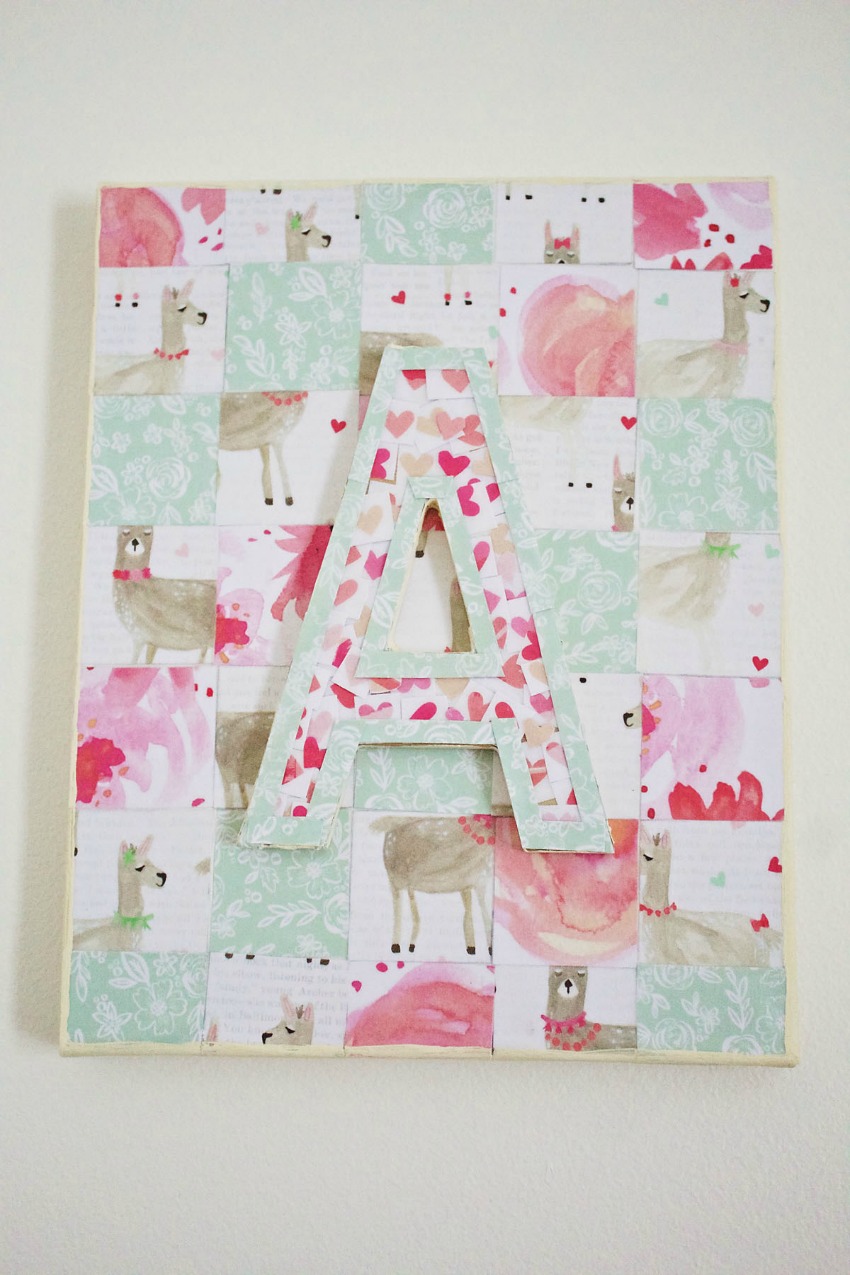
I then painted the edges of the pressboard letter and canvas using acrylic paint in warm white. After that dried (another 10 minutes), I glued the pressboard letter to the centre of the canvas and waited for it to dry once more. The final step was to hang the piece up in Abigail’s room. I decided to include it in a mini-gallery above her coat rack, where we plan on building with more frames and art work. It adds just a bit of shabby-chic flair that I love!
All in all, it was a really enjoyable DIY project that created a beautiful piece for Abby. I loved getting to make a personalized item by hand for my daughter, and one that also encouraged me to get creative with color schemes and design.
And of course, most importantly, it was an opportunity to reconnect with my long lost love of Mod Podge! And friends, I can tell you that love affair never really ever ended 😉
Galleries of drawings, photos, and artwork are a fantastic way to spruce up any living space, and this wall hanging would be a marvelous and personal addition. And if you’re wondering where to find budget-friendly, high-quality picture frames, look no further than Wayfair.ca’s selection here —and be sure to check back here for more tips on how to discover The Best of This Life and the joys of Mod Podge with me!
- Elevate Your Gift-Giving with Timeless Pieces from Vincero - February 5, 2024
- The Glow Up: Elevate Your Skincare - January 26, 2024
- Enjoy the Health Benefits of Smoothies - January 3, 2024

What a lovely project and adorable room. (Abigail is also very sweet, but you already knew that 😉 ) I have never used Mod Podge ( I know, a shock right?) but am now looking around the house to see what I can do. lol.
Aww, thank you Elizabeth, she sure is a sweetheart! I’m excited for you to try Mod Podge for the first time!! xo
this is so super adorable. I can see this being part of her room for years to come:) and who ever forgets their first modpodge project!
Heather
https://heatherinheels.com
Haha, right?! Yay for modpodge!! Thanks so much for your sweet comment, I’m really happy with how it turned out!
That looks fabulous. Love that little fox too.
Thanks Jan! She loves foxes!